As you might have already gathered from the obvious title, MailOptin is a Listing Building and Newsletter Plugin for WordPress. And this is its review.
The plugin is very popular amongst the blogger community and can help you increase your subscriber count significantly. You can use the plugin to generate leads, send automated newsletters, automatically trigger events, display targeted messages across your WordPress site with popups and so on. You can also add subscribe forms which you can design with a drag and drop form and template builder. It is also integrated with many of the popular email marketing services such as MailChimp, AWeber, Constant Contact, Campaign Monitor, Sendy and much more.
Now the plugin has a free and paid version. Here we are going to go in-depth with all you can do with the free version of the plugin. So without further ado, let’s get this review started.
Installing MailOptin
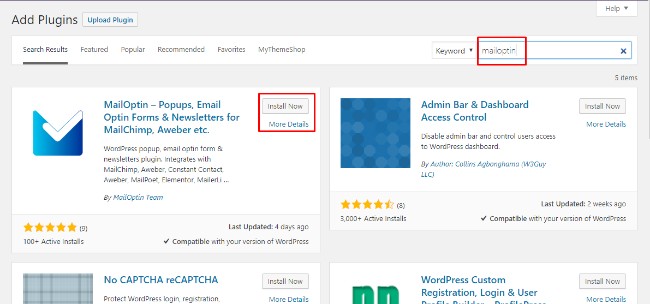
Just like any other WordPress plugin, to install MailOptin, you have to log in to your site’s dashboard, go to plugins on the side menu, click on add new. Then you will have to search for ‘MailOptin’ and once it shows up just click install. After installation is completed, activate the plugin, and you are good to go.
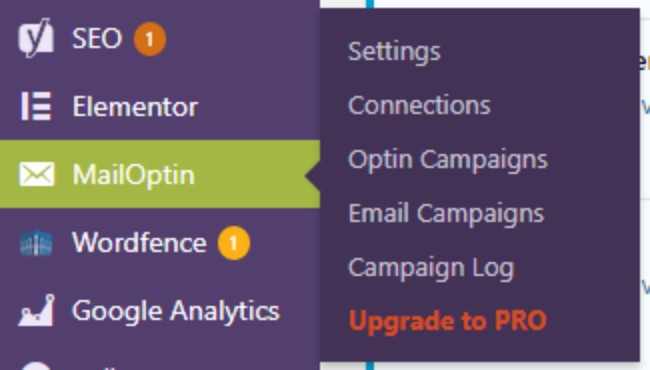
Once you have installed and activated the plugin, it should appear on the side menu. Click on it, and you will see a lot of options you can access. We will browse through all of them, but let’s start with the settings panel.
MailOptin: Settings
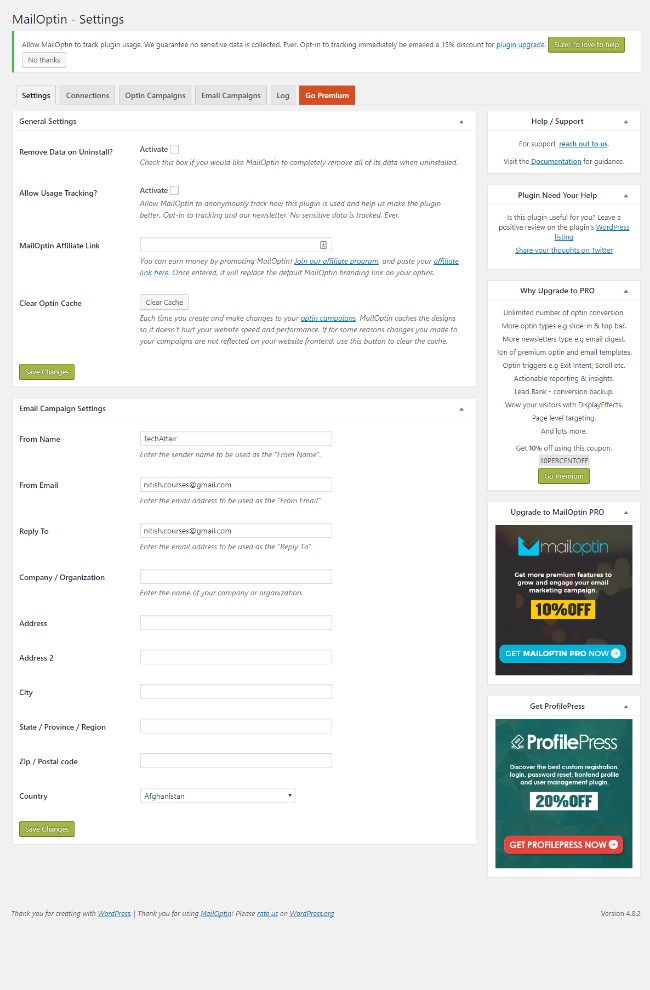
From here you have control over some of the basic stuff. For example, you can allow usage tracking; you can insert a MailOptin Affiliate Link, and go through all the Email Campaign Settings.
You can change the sender name, change the Email Address that is going to be used to send the emails, change the reply to the email address, insert details about the company name, address, and so on.
MailOptin: Connections
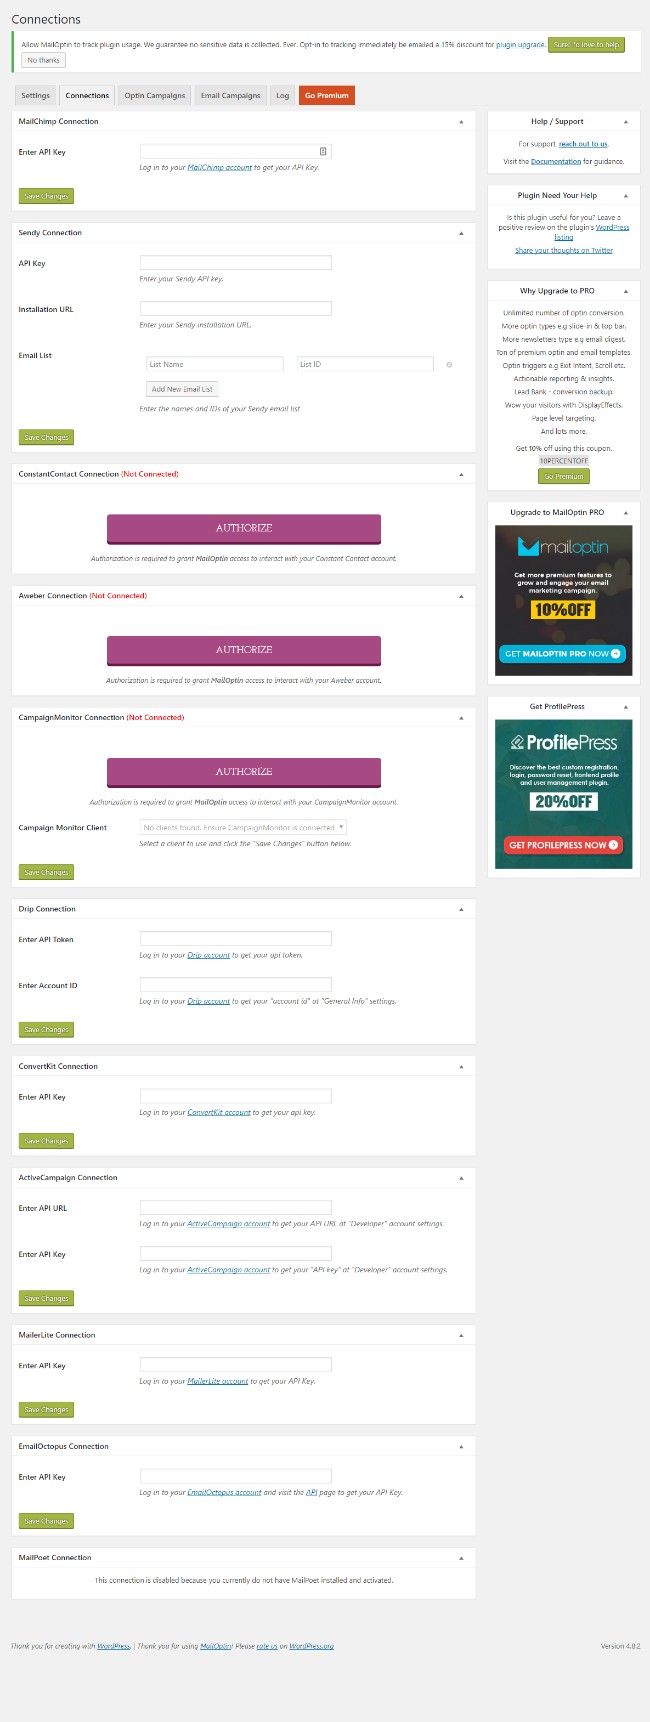
Remember when we pointed out that this plugin can be integrated with all the popular email marketing plugins. Well, this the place where you can do that.
In this settings page, you can add the API keys of any of the supported email marketing services that you use and the plugin will automatically add all the subscriber lists.
MailOptin: Optin Campaigns
Through the Optin Campaigns page, you get to create lightboxes, in-posts, sidebar and widget opt-in forms, and so on.
Here you get to create beautiful pop-up opt-in forms, which can help grab the visitor’s attention and help you get more leads. You can also add a sidebar and widgetized opt-in forms which will always be available to the visitor’s disposal, so they can subscribe whenever they feel like it.
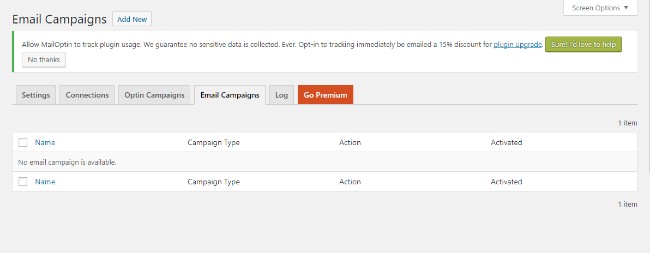
MailOptin: Email Campaigns
From here you get to add new post notification campaigns. This will automatically send an email to your subscribers informing that you have a new post published on your website.
Premium Version of MailOptin
As we already stated, here we were going in depth with all the features available with the lite version of MailOptin. Now if you like what it has to offer, and want things to be premium, then you can go for the paid alternative. Notable features that you will be getting with the paid version of the plugin includes features like:
- Automated/Event Triggered Newsletters
- Different Optin types like Notification bar and Slide-ins
- Exit-intent and Slide-in Triggers which can help boost conversion rates.
- Page-views and time on site
- Scroll based triggers
- Custom CSS
- Branding removal, so that your visitors gets to know it’s all you.
- A Lead Bank.
- Different and effective Display effects.
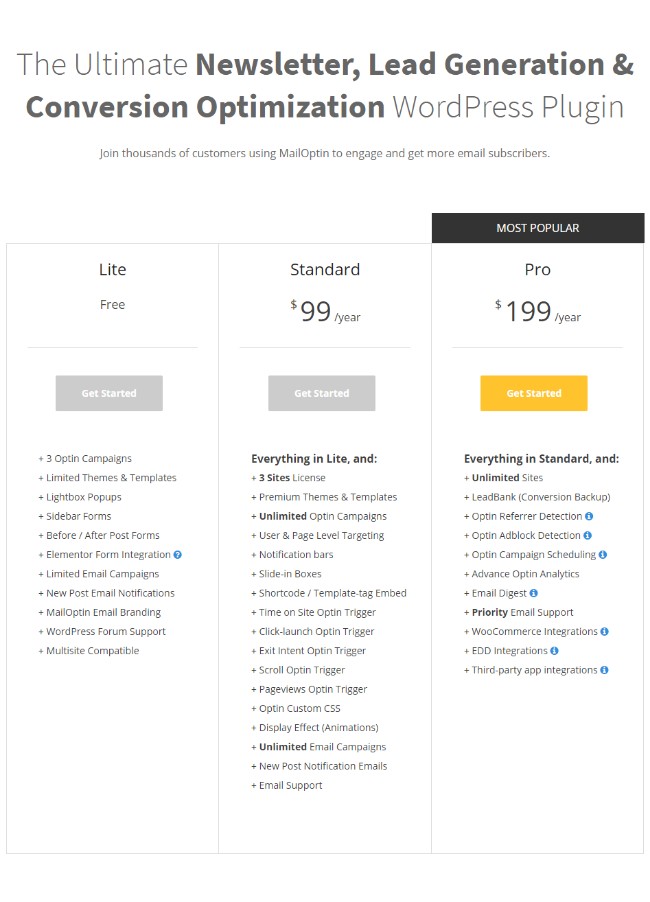
And many more features that you get to see on the pricing table below.
Now as you can clearly notice, you get a standard ($99 per year) and pro ($199 per year) pricing for MailOptin which comes with different features. Here you have to be judge and decide which features you will need to improve your game.
Get the free/lite version from WordPress plugin repository.
Premium version available from their website.



Leave a Reply