Themify Framework is considered as one of the best framework because it is real easy to use even for a complete newbie, their drag and drop system makes them one of the best player when it comes to WordPress theme developer.
Read: Daily Review: Themify Drag & Drop Builder Plugin
Hooks, which are technically called WordPress Action Hooks, allow users to insert their own custom executable code into WordPress. Hooks can be extremely powerful saving you time and money in development costs.
With release of Themify Framework 1.7.3, Themify has come up with real easy solution to add custom code via Hook Content without the need of creating a custom-functions.php file saving you time.
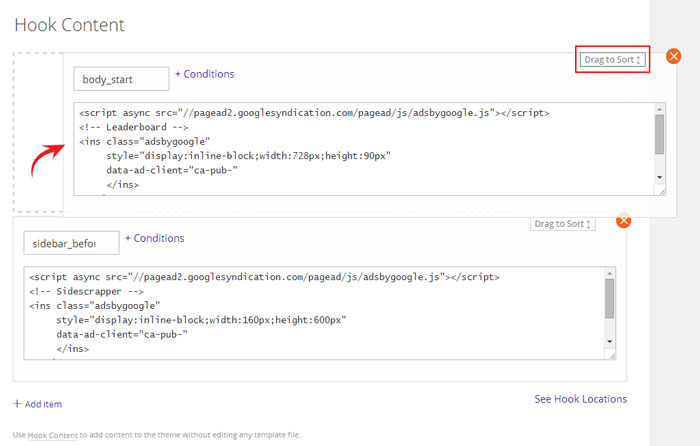
Using the Themify Framework Panel interface, you can now easily create Hooks in a matter of a few clicks. You can use Themify’s Shortcodes to use Themify pre-existing functions such as Slider, Twitter, Map and much more.
Also, it will save you hours of time with debugging code as you won’t need to sift through lines and lines of code.
This is definately another great update by Themify because adding custom code is really important these days as almost all leading theme developer has this functionality already.
It becomes really handy during theme version update because if you modify core files you may lose the modifications during version updates.
Adding a Hook
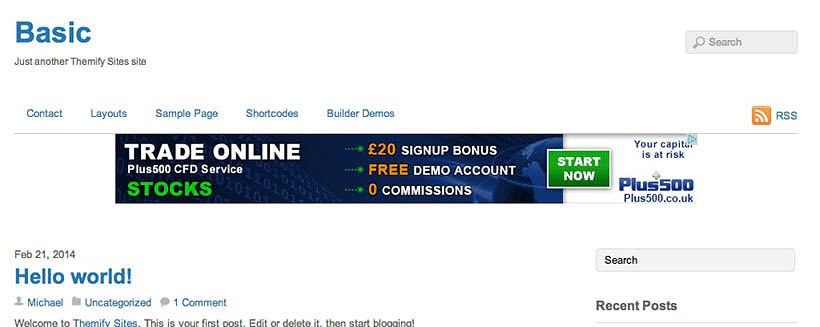
Themify showed one example to add a Google Adsense code between the navigation menu bar and the main content window.
To create a Hook, click the Add item button

You will be presented with the Hook controls
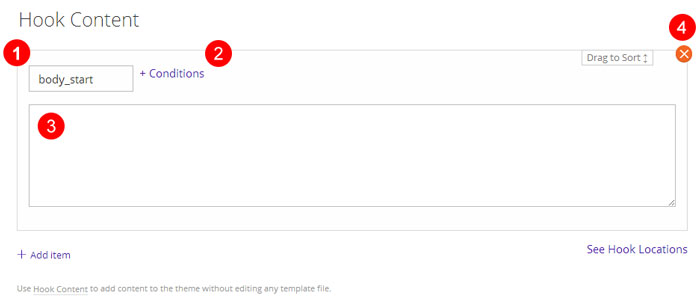
- Hook – drop-down menu of all the Hooks that are available in the theme
- Conditions – parameters and settings for the hook
- Code window – where you insert your custom function code
- Delete – delete the hook
To select a hook, just click the drop-down menu (1) and select it in the menu. If you are unsure where the Hook is in the theme, click the ‘See Hook Locations’ button to find it
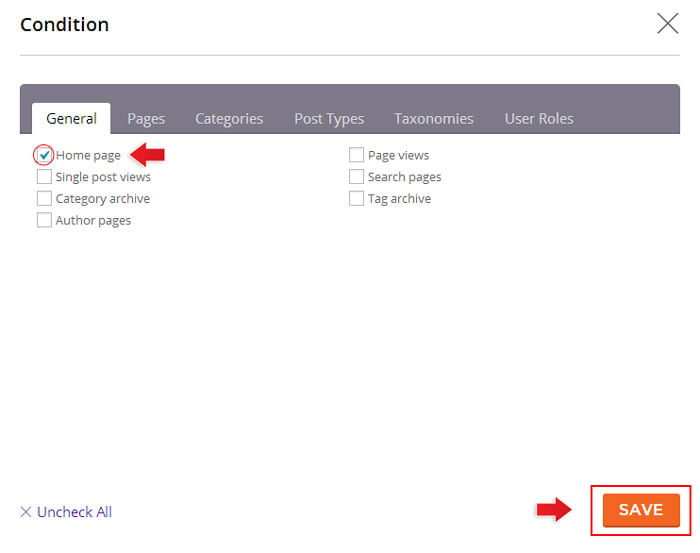
Hook Conditions (2) are the parameters that you set upon the Hook. Conditions range from having the Hook appear on a certain Page or Post like the Homepage, Posts assigned with a specific category like News or just in the Portfolio section.
To apply a condition on your Hook, click the +conditions button and check any box that is applicable and then click Save.
To insert your code, just type your code or paste it into the editor field.
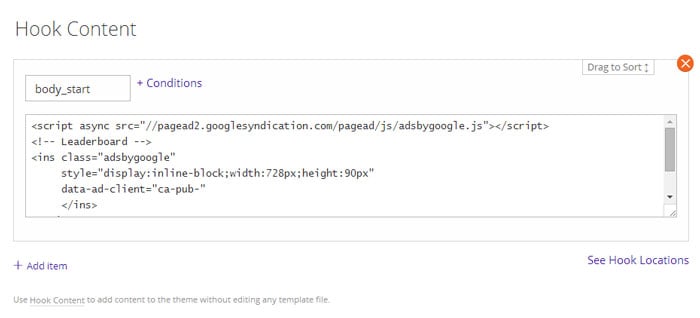
Click Save All when done. Below is the final result.
Article Via Themify

Leave a Reply