WordPress has been a blessing for bloggers as it enables them to get their site up and running within couple of minutes even for a newbie user, and here is a quick tutorial about the things you must do immediately after WordPress installation
Like any other content management system WordPress also comes with a default set of data and settings which you must go through and change it accordingly to make your site ready.
Now, if you are starting your blog from scratch, you need to first select a domain name which is brandable which you can find in Godaddy or other such domain providers.
Once you select the domain name get hosting for your site HostGator is one of the most reliable to cost effective hosting service, it is also one of the recommended WordPress hosting service provider.
[symple_box style=”boxinfo”]Checklist After WordPress Installation[/symple_box]
1. Make WordPress Up to Date
The very first thing which you need to make sure is that you are using the latest version of WordPress, if you do not use the current version it will increase the chance of being hacked.
WordPress releases core updates to make sure that there is no security threat or any bug in the software. Along with WordPress you also need to make sure that the theme and plugins are up to date.
2. Use Strong Password
A weak password may provide easy access to unauthorized parties in your site, so to avoid that you have to make sure that your password is very strong and unpredictable.
While many users keep easy password to make it easy to remember, it can spoil all your hard work. So it is better to go for a password which is really complicated even if it gives you hard time to remember it.
3. Decide About www Version or Non www
This is one of the most important things which you must look at and decide once after WordPress installation, whether to use www version or non www version of your domain, you have to update it accordingly in Settings >> General.
Other wise it can create a huge duplicate content issue for your blog as search engines like Google will treat the www and non-www version of a page as two different pages
4. Check Permalink
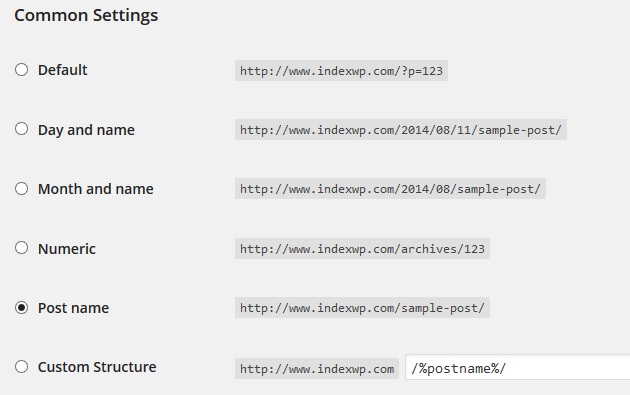
The permalink structure of your blog is very critical from SEO perspective, after WordPress installation you need to go check your permalink structure and make sure is is SEO friendly (www.domain.com/postname)
To check it go to Settings > Permalink Settings
5. Install Theme and Plugins
Once you have installed WordPress and checked Permalink Settings now you can proceed to install your favorite WordPress theme and Plugins.
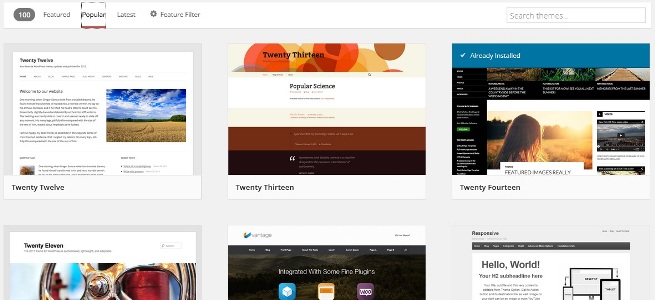
To Install theme you need to go to Appearance > Themes > Add New here you can select a free theme from within WordPress dashboard or upload a theme which you have purchased from other source.
Similarly you need to install some of the important WordPress plugins, to install plugins go to Plugins > Add new. You must install a SEO plugin and WordPress SEO by Yoast is the most widely used and recommended WordPress SEO plugin.
You will also need a cache plugin and we recommend W3 Total Cache plugin which is another very popular WordPress plugins. Other then these we have listed some important WordPress plugins for your site here.
6. Change Default Category and Add New
By default WordPress creates a category called ‘Uncategorized’. Many newbie WordPress users forget to change this category and publish articles under this category which will make your blog look unprofessional.
So to change the default category
- Go to Posts > Categories
- Click on ‘Uncategorized’ to edit it – change it to something relevant
Also, to add new categories
- Go to Posts > Categories > New Category
7. Update Ping List
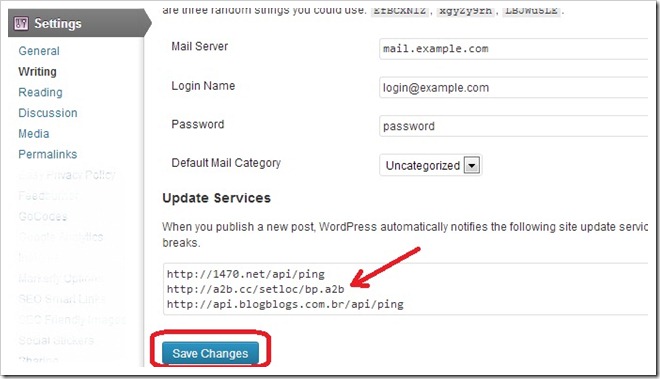
by Default WordPress doesn’t come with an exhaustive list of ping services, so once your site is ready to post articles you need to update the ping list to notify more services about your new posts.
Now to add new ping services you can go to Settings> Writing and update your list. We have already published an updated list of ping services
8. Set Up FeedBurner Account
Generally WordPress provides your feed under yourdomain.com/feed/ which you can link to FeedBurner Account. FeedBurner is part of Google Service, and it can be linked to your Google Account.
9. Set up Analytics
Without analytics you will be clueless about performance of your site, so this is another most important and one of those things which you need to do after your WordPress installation.
Google analytics is undoubtedly the preferred choice as far as analytics is concerned, it will provide you detail insight of your site’s performance.
10. Remove Default Widgets
WordPress will push in some widgets on your sidebar immediately after WordPress installation which you can keep or change it as per your requirement.
11. Create About us, Privacy and Terms Page
About us, Privacy and Terms, these three pages are the most important pages of your site, because these pages will provide your users a better perspective of your sit.
If you are creating a business site n WordPress, these three pages becomes even more important.
Conclusion
There are number of other important points which you need to take care of to make a quality site on WordPress like creating good quality content, the frequency of posting, length of your articles, design of your theme and lot more. However, the above mentioned points will somewhat take care of the initial setup.


Leave a Reply